

Lockdown Staycation Ideas – Indoor Camping!
Lockdown Staycation Ideas
5 Easy Steps to a low cost and low mess indoor camping experience
Thinking up ideas for a staycation is more challenging then ever with lockdown and stay at home orders in place. Planning ahead can be difficult with the uncertainties of the pandemic. We all look forward to long weekends. In Canada, May 24th is a holiday in honour of Queen Victoria’s birthday and is considered the first long weekend to kick off the summer season. For many Canadians, it means the beginning of camping season, gardening and local festivals, concerts, outdoor markets and picnics. While we can still enjoy some of these outdoor activities, the options are limited by the restrictions of the pandemic. Here’s a staycation idea that actually works really well during a pandemic.
Have you every tried camping in your own home?
Chances are that there is more then one of you out there thinking that even camping in your backyard sounds like a task you are simply not up for.
What if I told you that you are not the only one? It doesn’t have to be difficult. And it can be a lot of fun for both you and your kids!
What if I told you can now camp with the kids, with no packing, no driving, no paying for campsite rental, no bugs, no questionable bathrooms, and you can sleep in your own bed?
This is an opportunity to glam it up with your own style and it will certainly be a post-worthy experience to share – Don’t forget to tag us.
Here’s 5 Easy Steps to create that perfect at-home indoor camping experience!
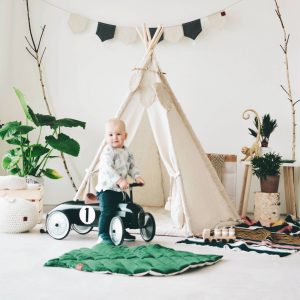
- FORT – Set it up!

No camping experience is complete without a tent. Depending on the age of your children, you can choose to make this an all-hands-on deck project with the children helping set up your camp site or you can make it a surprise. This can be your child’s bedroom, basement or living room area. Notice I am not mentioning outside 😉!
Make it -check out these links for tents you can create with minimal supplies or talent.
https://www.artbarblog.com/easy-forts/
http://www.thriftyandchic.com/2016/01/diy-4-sided-drop-cloth-teepee-for-20.html
Add mini lights & decorations for a pitch-er perfect tent!
2. FOILAGE
Bring the outdoors in! This is really just an extra little thing you can do to bring the outdoors in and enhance the camping experience.
You can gather Outdoor items, stones, logs, branches, indoor or outdoor plants to place around the “campsite” or even setup an artificial tree.
3. FIRE-Spark it up

One of the best parts of camping is the bonfire! A bonfire is the perfect place to gather round and sing a campfire song, or tell funny stories. It’s also a great place to read books.
Make it- click on this link for an easy way to build a crafty campfire.
http://aboutfamilycrafts.com/how-to-build-a-campfire/
4. Food- Feed the fam!

If you don’t have a fireplace to roast marshmallows the next best thing to the campfire is a BBQ. Grill some hamburgers, hot dogs, corn or make simple PB&J sandwiches. You can even roast marshmallows by holding a stick above the heat of the BBQ grill.
Whatever you decide to do – Keep it simple!
Here are 3 S’more options to enhance your camping staycation
Make it-Microwave Smores- https://shelfcooking.com/smores-recipe/
Smore snack bag- https://ziploc.com/en/Recipes/Sweets-And-Desserts/S-Mores-Mix
Make sure you take a nice walk after those sugary smores and tire out those kiddo’s so everyone gets a good night sleep including Mom & Dad!
5. FUN!

Last but not least, Have Fun!!!
Hopefully by now the kids are tuckered out and ready to retire to their sleeping bags. Before they do, make it dark, turn on those string lights, lamps and flashlights and play with the shadows. Add in some soothing nature sounds and soothing music too!
You can even make your own stars on the ceiling with a flashlight! Just cover the flashlight with black paper and cut out the stars.

More ideas to add to your indoor camping experience:
Read some camp related stories
https://www.pre-kpages.com/books-camping-preschool/
Shadow puppets
https://whereimaginationgrows.com/exploring-light-with-shadow-puppet-play/
Starry sky flashlight
https://happyhourprojects.com/make-a-starry-night/
To learn more about Alpha’s Discovery Kids Programs, click here!

Mother’s Day Pandemic-friendly Mommy and Me Ideas
Mother’s Day gifts you can give yourself
As a mom, time spent with your children doing things to grow and learn together is one of the best gifts you can give yourself for Mother’s Day. During a pandemic, it may seem that our choices for activities are limited. This year, what better way to celebrate then to get outside and soak up some immune-boosting Vitamin D! Sunshine and fresh air provide so many health benefits to boost your immunity and mental health. Give yourself a gift that will create lasting memories this year. Here are 3 ideas that will leave you with a smile, tired little children and hopefully a few great photos. You don’t need to go too far .These 3 activities can be done in your own backyard, neighbourhood trail or park.
YOU’RE A NATURAL

1.GET YOUR HANDS DIRTY TOGETHER AND DO SOME PLANTING
Anyone can be a be a gardener even if you do not have a green thumb or a big garden. Planting can be done in a garden, garden box or even a container you may already have at home. For instance, a jar, a bowl, or box. You can even have your child paint the flowerpot before or after. You choose the size of your project. Pick up some seeds or little plants and some soil at your local garden centre or grocery store. You and your child can get your hands dirty together and create some new life! This growing garden or plant is a gift for you all season long!
EASY TO GROW PLANTS FOR KIDS- CHECK OUT THIS LINK
YO’MAMA

- STRETCH & BREATHE TOGETHER AND DO SOME OUTDOOR MOMMY AND ME YOGA
Practicing yoga with children is one way to build a great relationship with them. Doing simple yoga poses together can help both parent and child to relax, be in the moment, and obtain physical activity at the same time. We know yoga is good for flexibility, but yoga can also help with anxiety and muscle development for both adults and children. Combining the outdoors with yoga helps as a natural mood booster. These good feelings will help you connect and bond further with your little one. It does not matter if you are an advanced yogi, a beginner, or a newbie everyone can benefit from deep breathing and stretching. Start by just taking off your shoes, face each other and taking a few breaths. This can be on a mat, towel or in the grass. You get to choose if this will be a more an active yoga or calming yoga. You can make it up as you go along getting inspiration from your outdoor surrounds but remember to be safe and careful. Enhancing your connection with the natural world and your child through movement can be a gift you give yourself.
Nature Inspired Yoga Poses: CHECK OUT THIS LINK
MOM YOU ROCK

- GET CREATIVE TOGETHER AND DO SOME ROCK PAINTING
Being outdoors not only stimulates your mind but also your creativity. Art projects can be messy and often require a lot of space in which to create. So, what better place to set up a rock painting activity? Even if you do not have paint brushes you can use Q-tips or your fingers. If you do not have paint, you can use nail polish, coloured water or sharpie markers. You get to choose if this is an open- ended painting experience or want to create a special design. You can of course make finding these rocks part of your Mother’s Day experience by going on a little walk together or collect them in advance. Either way, your are left with a cute keep sake and minimal mess to boot. This is a gift you can give yourself.
ROCK PAINTING 101: CHECK OUT THIS LINK
Here’s a link to our kindness rocks activity if you want to leave some painted rocks out in the community for other’s to find.
Try one or more of these outdoor mommy and me activities and reap the benefits. No matter what you choose to do this Mother’s Day,
Yo’ mama , you ROCK !
HAPPY MOTHER’S DAY, You’re a natural !

Planting a seed to inspire learning
Planting a seed to inspire learning
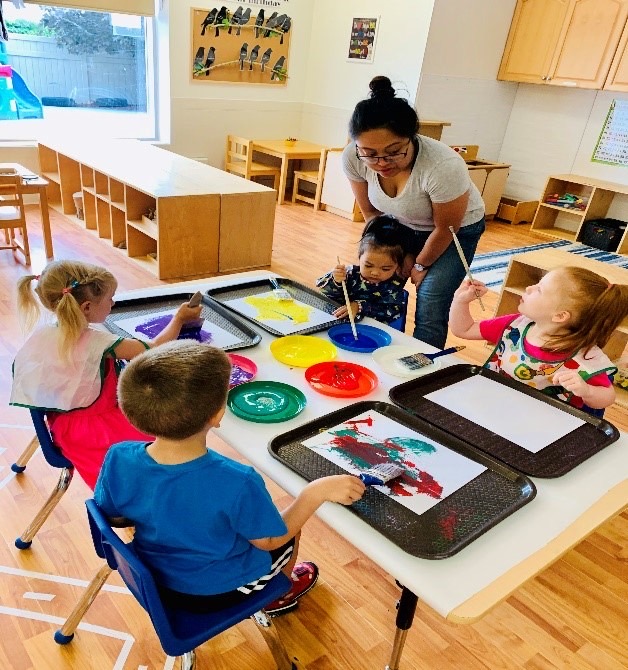
Planting a seed is the simple act of setting a process into motion – both in a garden and in a classroom. As educators in the classrooms, we are always planting seeds to spark children’s curiosity, inquiry and discovery. With an emergent curriculum such as ours at Alpha’s Discovery Kids, students are empowered learners, and the teacher takes the journey along with her class.
In many cases, children spend a great deal of time in a childcare setting with limited experiences in the world, especially during a pandemic. Planning based on the children’s interests is not effective all on its own. That is why we introduce projects to expand on the child’s learning. As educators of young children, it is our responsibility to empower children and to make them a big part of their own learning. It is important to understand that it does not necessarily matter where the topic originates from, if the direction it takes from inception follows the lead of the children.
One of the ways we do this is by providing and introducing rich, developmentally appropriate materials and new topics and concepts that the children may not be exposed to yet. By providing engaging materials that encourage exploration and creativity, we can provide opportunities that are open¬-ended and through these experiences provoke further interests. The materials can be purposeful, intentional and project based without becoming teacher directed.
We are continually plantings seeds in the minds of the children to inspire curiosity with the goal of teaching the children something new. Our educators have gained confidence in knowing it will take form without direction. A seed cannot stay a seed forever once planted. When cared for with nourishing soil, rays of sunlight, and water, they change shape and start to become whatever it is they were meant to be. We apply similar parallels to our approach to child development and learning. Like all things that grow, plants, trees, flowers, we want them to flourish!
To find out more about our Four Pillars of Learning curriculum, click here.
Follow us on Facebook or Instagram to see the curriculum in action. We offer many ideas that you can also try at home!
DIY Sensory Bins – How to Make your Own Sensory Bin
DIY Sensory Bins – How to Make your Own Sensory Bin
Sensory bins are an amazing educational tool for children to learn about their world using their senses! Young children tend to gravitate toward sensory play as they tend to explore their world with their senses. The benefits of sensory play are numerous. Sensory play helps children to focus, helps them to feel calm and it develops many skills from cognitive to physical to social skills.
Recently, I saw that a local craft store was selling pre-made sensory bins for $25 but you can make your own for a lot less. At Alpha’s Discovery Kids Preschool and Daycare, we make individual sensory bins for each child and change the items in the bins almost every day. Here’s a step-by-step guide to making your own sensory bin.
To make your own sensory bin, you first need to know what it is! A sensory bin is a hands-on sensory experience for kids, in a contained area such as a storage container. It contains many different items that can be explored using your senses.
STEP 1: CHOOSE A CONTAINER
When choosing a container, consider your space and choose something that will fit in your space. The size of the bin will depend on the age of the child, but as a rule, try to find the biggest container that your child can manage. The child should be able to hold the bin and take it from a shelf independently. Plastic clear containers are best with a good lid that seals well. You don’t have to spend a lot on the container as you can usually find them at a dollar store for a few dollars.
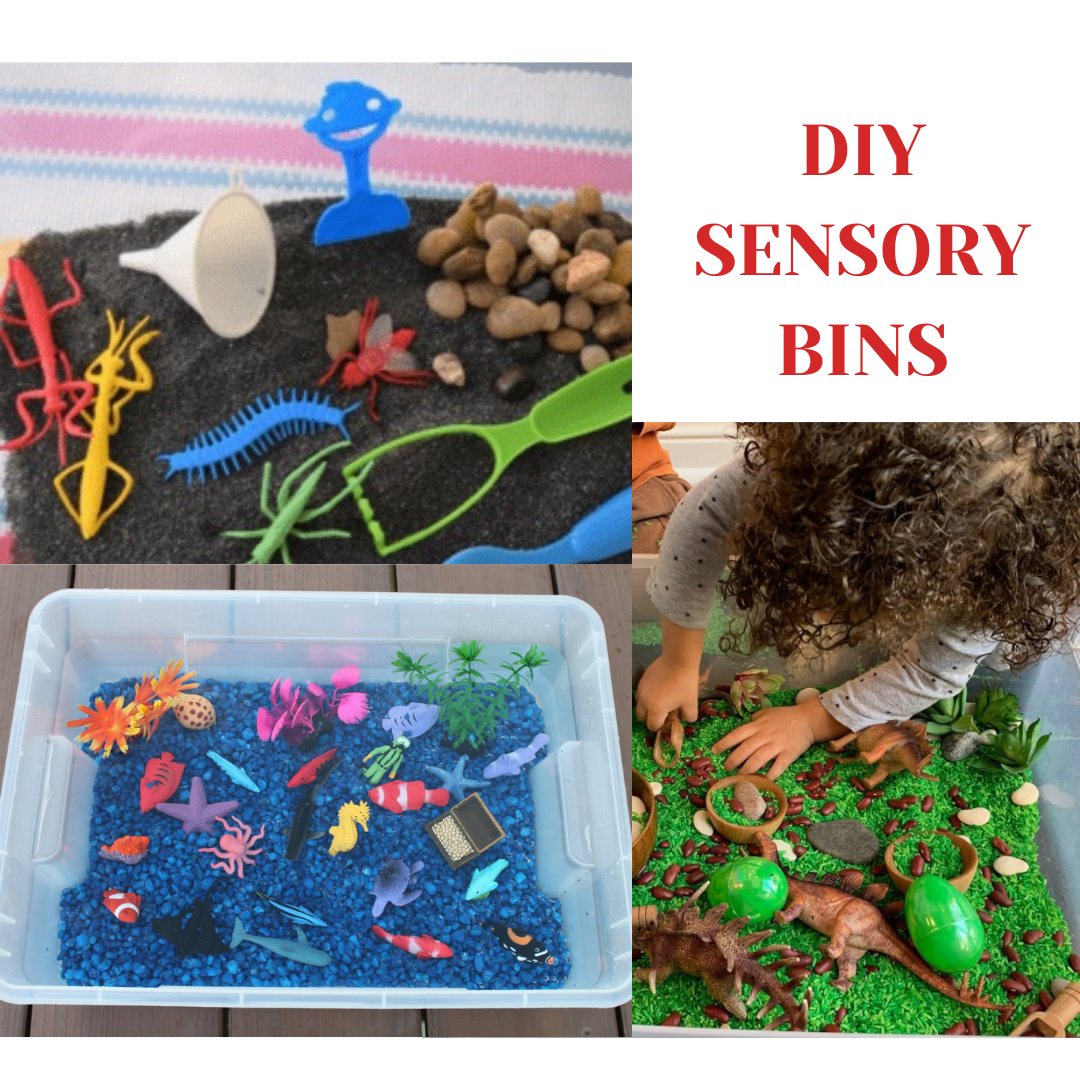
STEP 2: CHOOSE THE FILLER
The sensory bin filler is the item that makes the sensory fun. Please note that you can change your filler often – but we recommend at least once per week to make it interesting for your child and keep it clean. Some examples of fillers are: water, sand, rocks, water beads, shredded paper, coloured Epsom salt, play dough, fake grass, fake snow, wooden beads and natural elements (leaves, twigs, soil, seeds). You can also choose food items such as beans, dry pasta and rice but we prefer not to use food items, to minimize food waste. Keep in mind your child’s age and ability when choosing a filler (including potential choking hazards) and ensure that play is always supervised by an adult.
STEP 3: ADD ITEMS
Once you have the filler, the next step is to add items that spark the child’s interest. One of the best parts of sensory bins is all the filling, dumping, pouring and transferring that takes place! When adding items, you are only limited by your own imagination – or your child’s if they choose their own items to add. The items you add will depend on what type of filler – for example, you will have different items if the filler is water vs. wooden beads. Here’s some ideas for items: sifter, sieve, smaller containers, watering can, shovel, buckets, animals, dinosaurs, cars, dolls, spoons, small bowls, rolling pin, cookie shape cutouts, etc. You can also choose a theme for your bin to focus the learning on a specific concept – such as bugs, oceans, or rainbows.
Step 4: HAVE FUN!
The best part of making sensory bins, is getting to enjoy them with your child! We encourage you to play and explore along side your child!
For more information about our Four Pillars of Learning Curriculum, visit our curriculumcurriculum page.
For more ideas on how to engage with your child, visit our Youtube page.

Heart-centred yoga for kids
Heart-centred yoga for kids
Valentine’s Day is almost here. It’s a great time to stop and think about what love means to each of us. When we ask the children what they love they often tell us “Mommy & Daddy ” and sometimes “cookies”. Another great way to honor Valentine’s Day is by opening our hearts through creative movement.
Although at this time of year, we often focus on loving others, self-love is also important. In fact, it’s often said that you can’t love anyone else until
you love yourself first. Self-love starts with taking care of our bodies, minds and spirits and being healthy.
At Alpha’s Discovery Kids, we are packing our student’s toolboxes with mindful awareness skills through our Four Pillars of Learning curriculum. Yoga poses are a great way to connect to our body, mind and spirit. WE LOVE YOGA and this adorable series of poses really make our hearts skip a beat.
Here’s a poster to assist you with your poses.
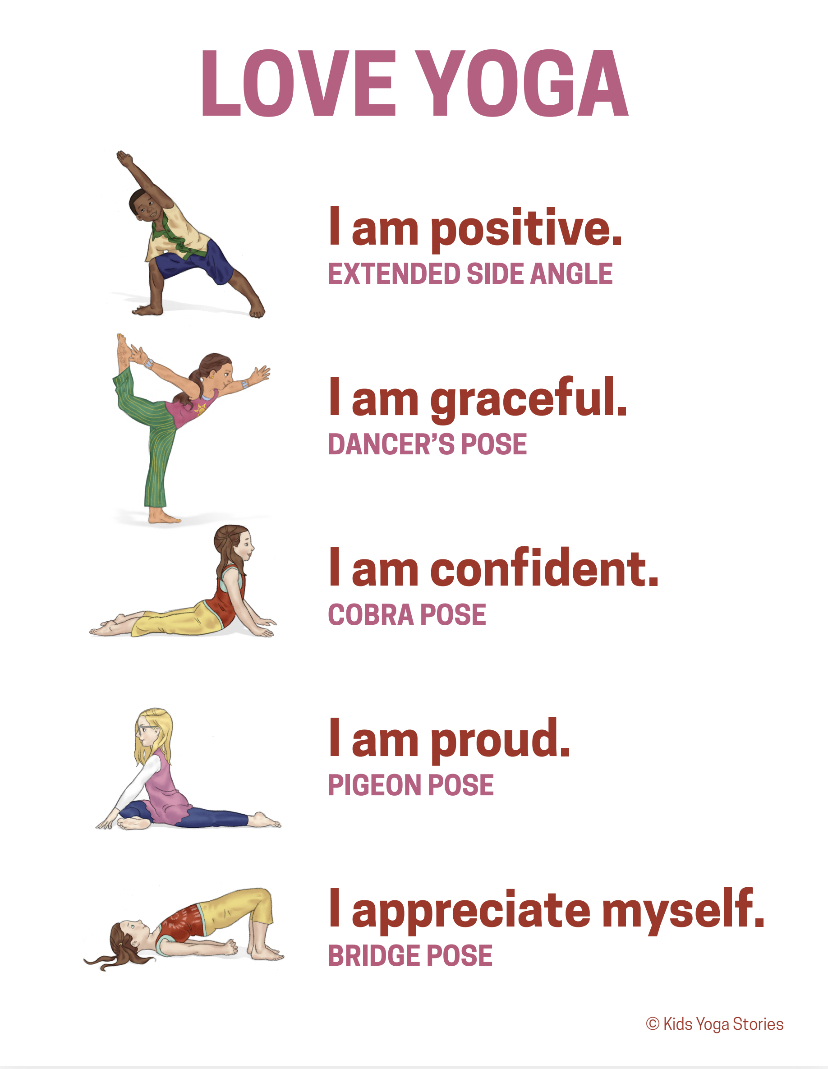
REMEMBER It’s called practice because it takes time to learn. As always don’t forget to BREATHE and be safe.
xoxoxo
For more lovely kids’ yoga ideas, check out www.kidsyogastories.com
For more information about mindfulness check this out: https://inlpcenter.org/mindfulness-training-experience-the-benefits-in-your-life/
For more information about how we teach mindfulness with young children, check out our Youtube Video.
M is for Math
M is for Math
At Alpha’s Discovery Kids we understand the importance of educating children using a wholistic approach. Math is a key component of our STEAM (Science, Technology, Engineering, Art and Math) program which is the second pillar in the Four Pillars of Learning curriculum.
Math plays a major role in a child’s development and helps children makes sense of the world around them. Children between the age of one to five years old are beginning to explore patterns and shapes, compare sizes and count objects.
Building numeracy skills is one of the first things you will do with your child. Many children learn to count from 1-10 by the age of 3 years old. There are so many opportunities to count with children daily. You can count the cars on the road or the plates at the table or blocks in a tower. The key is to incorporate counting with everyday objects in a hands-on way so that it makes sense to a child and they can visually see the objects being counted. Once they have the concept down, you can start to introduce the actual written numbers so they can associate the concept with the actual number.
Using number concepts and skills to explore their surroundings will enable them to problem solve in the future. It helps them to develop confidence in their ability to think things through and develop a process that makes sense to them.
Problem solving skills can be a difficult concept for many children. Supporting this process without doing it for them can support growth and development. It can assist with a sense of accomplishment. Helping children to create connections to discover various relationships. (e.g. characteristics, size, colour, shapes)
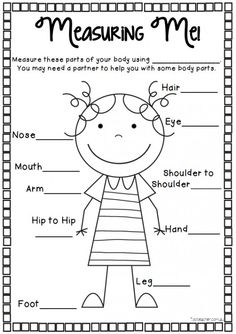
Measurements can include ordering and comparing objects to figure out time, weight, length and graphing. I love to use measurement to teach so many math concepts. Here’s a simple activity you can do with measurement. Take out a measuring tape and measure your hand and your child’s hand. Compare the size of your hand to your child’s and look at the number (size) of your hand vs. your child’s hand. This will help your child to understand bigger numbers and smaller numbers. You can also count the numbers of the measuring tape. You can continue this activity with your feet and other body parts as well as your whole self. It’s a great way to teach numeracy and comparisons of numbers.
Classification can be turned into a fun game that allows children to make like items. You can provide them with a blue, red and black basket. Then lay out multiple objects in the same colours. Ask the children to sort them into their proper baskets by matching the colours.
When you stop and think about it, math is used in many every day tasks performed by young children. Anything they do can be counted and documented.
As you can see, Math does not have to be difficult! It can be fun and easy! To find out more about our Four Pillars of Learning curriculum, click here.
The Benefits of Listening to Classical Music for Young Children
The Benefits of Listening to Classical Music for Young Children
Did you know that classical music is beneficial for young children? Here are 5 reasons why you should encourage listening to classical music with your little one!
Creates a Calming Effect
First and foremost, classical music has a calming effect. Many doctors recommend that woman listen to classical music during pregnancy for that very reason. When a baby is first born, playing classical style music, especially during naps, will help soothe and calm your little one! This is not just calming for infants, all young children and event adults tend to experience a sense of calm when listening to the sounds of classical music.
Improve Listening Skills
Listening to music from classical music composers such as Beethoven and Mozart at a young age, has been proven to increase concentration skills in many young children. Studies have also found that children who listen to those specific musicians are more self-disciplined.
Improve Brain Function
One of the most known benefits of listening to classical music is the increase of brain function. Classical music helps develop the genes that secrete dopamine and improves synaptic function.
Become a Fan of Classical Music
Most everything we do in life is based on the habits we have formed throughout our life, especially in the early years. Listening to classical music can become a habit for those who have always listened to it. So, start them young!
Improves Creativity
Classical music, in general, is very inspiring. Since the music improves brain functions, it also inspires new thoughts which helps one to become more creative!
In our classrooms, we play classical music melodies during our nap times to create a calm atmosphere. We also use music to inspire creative expression through art. We play classical music while children are painting or creating art.
For more information about the benefits of classical music, click here.
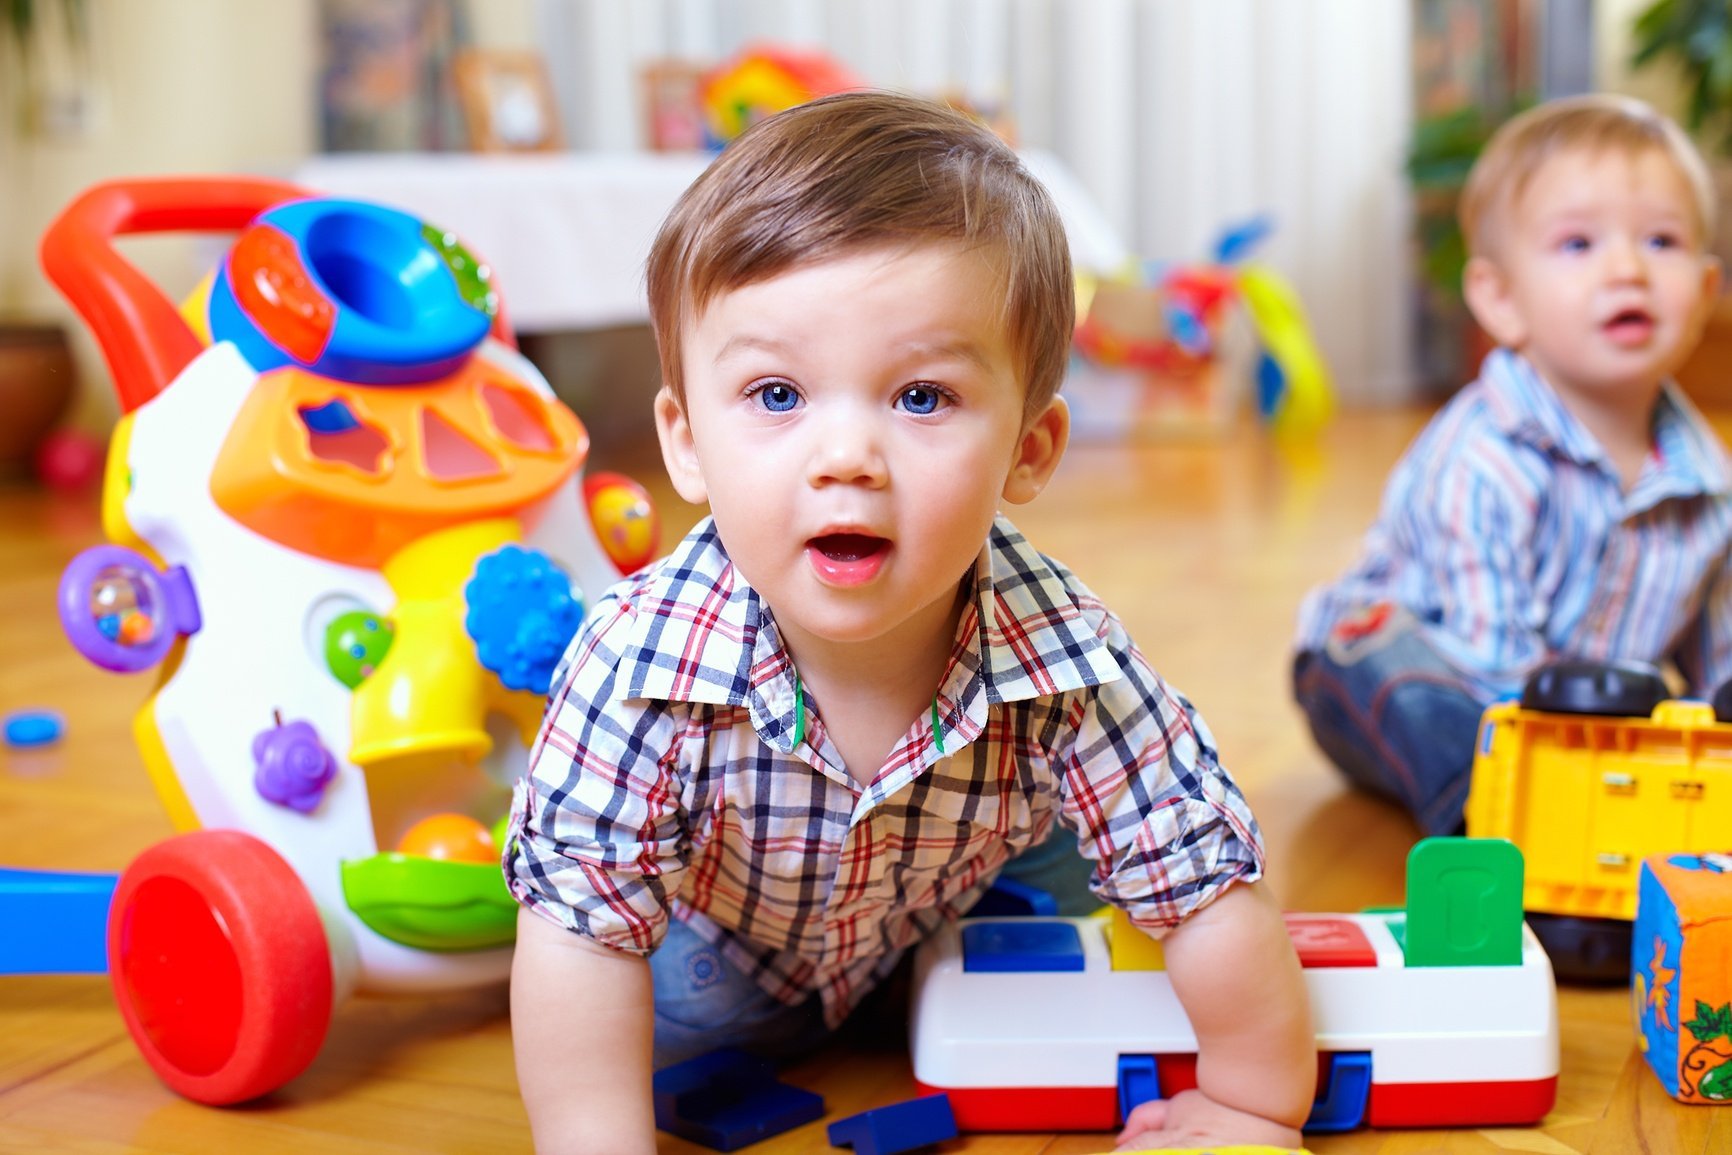
How Parents Can Prepare their Child to Return to Daycare
How Parents Can Prepare their Child to Return to Daycare
As parents prepare to return to work and as daycare reopens, it is critical that parents prepare their child to return to daycare. With children being away from daycare and routines for months, we know it will be difficult for both parents and children to get back into the routine. We have create some tips to help parents to make the transition as smooth as possible as you get ready to return to daycare.
The week before returning to daycare:
- Talk about your child’s teacher, friends and people they know at school.
- Show pictures of people at the daycare and talk about fun times. You can look at pictures of your child on the HiMama app and any class photos. Ask your child if they remember the names of the people in the pictures.
- Be excited and positive. Try not to show any anxiety or fear about returning to daycare. Even if you may be feeling a little anxious – try to stay positive. Your child will feed off of your emotions.
- Try to use positive language when talking about what you can and can’t do at daycare. For example, instead of saying “don’t touch your friends” , you could say “ We can give air hugs like this“
- Drive by the daycare and stop in front of it. Point out that you will be going back very soon.
- Give them answers to the questions they ask rather then information overload which can make them feel anxious. Sometimes less information is better.
- Show them how to wash their hands well. For 20 seconds and use soap and water.
- Try to follow the daycare schedule routine with wake up time, naps and lunch time.
The day before returning to daycare:
- Tell your child you are excited to go to work and see your own friends (even if you are working from home)
- Pack your backpack with items to bring to daycare.
- Talk about PPE. Show them what a mask looks like and put one on the doll and on yourself. For toddler, play peek-a-boo with the mask.
- Tell them that a teacher will be waiting for them at the door because they are so excited to see them. If possible, let them know that you won’t be going into the classroom.
- Bring in a family photo if you have not already done so (something recent)
- Get a good night’s rest.
First Day Back:
- Keep in close communication with your teacher (messaging)
- Have trust and confidence in your educators – they are there to support you
- IN ALL CASES – Give it some time – you will see that each day will prove to be better.
For more information about what you can expect as daycare re-opens, click here.
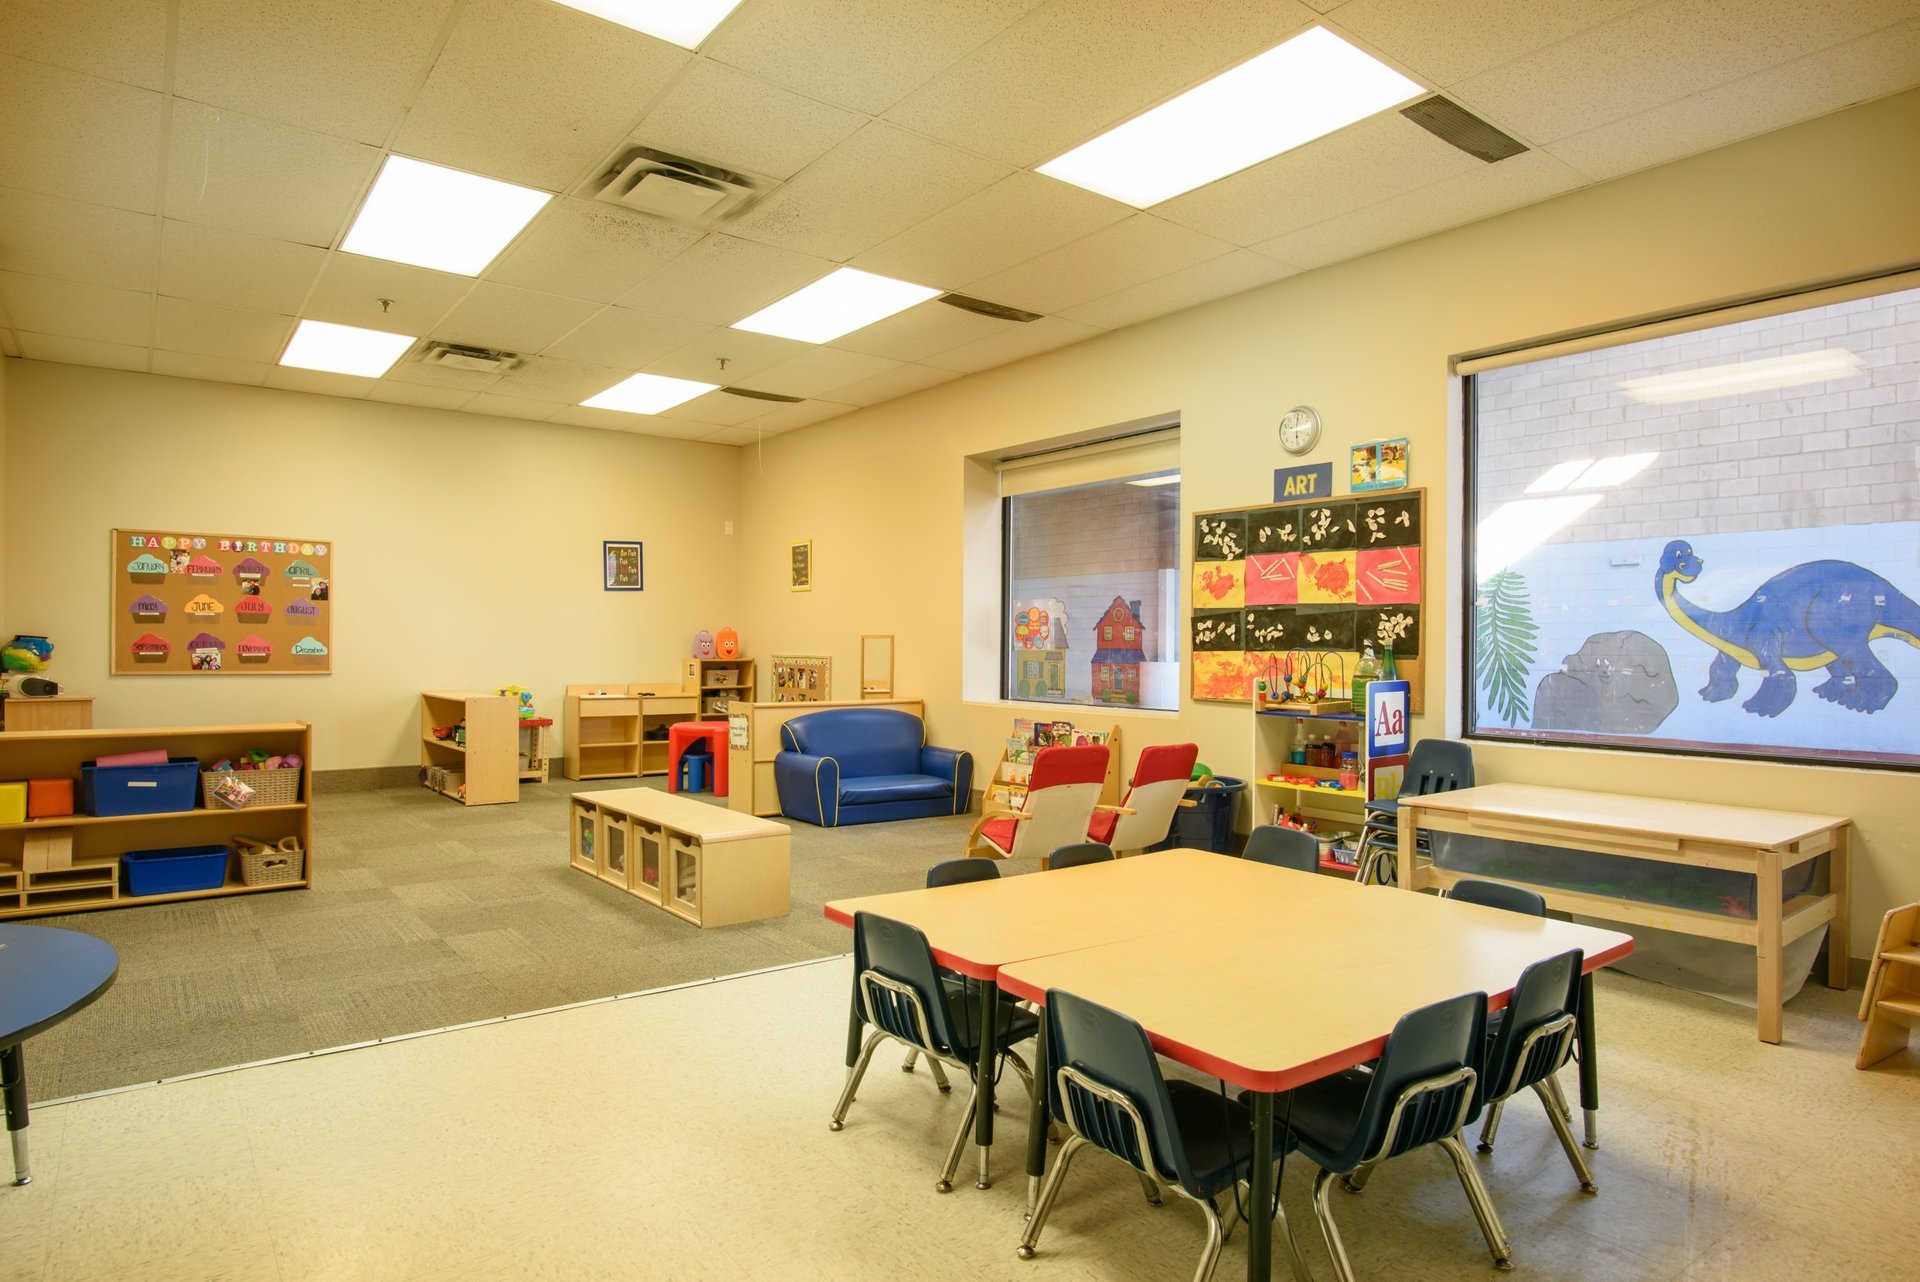
What to Expect as Daycare Re-Opens
What to Expect as Daycare Re-Opens
As we get ready to return to daycare at our Oakville and Mississauga locations, we know that the decision to return to daycare is a difficult one for parents. We can truly empathize with parents with respect to dealing with the daily unknowns and fears related to this pandemic. As we start to transition to a new normal, we are providing information about what daycare will look like for you and your child.
The first thing you should know is that we have been working hard over the past several weeks leading up to this announcement to prepare the daycare for a safe opening. We have been deep cleaning, adjusting our processes and procedures and training staff on the new protocols.
In our role as educators of young children, physical distancing from children is not always possible. Therefore will take every precaution with respect to screening, PPE, staff training, cleaning, sanitizing and altering or enhancing existing practices.
What will daycare look like? To start, we will have smaller class sizes (10 people total – 8 kids and 2 teachers) and those 10 people will stay together for the entire day everyday. Screening will be done on each person that enters the facility (both staff and children). This is a key part of the process to ensure that all staff and children are healthy (free from illness symptoms) when they enter the centre, have not travelled and have not been in contact with a sick person to give everyone peace of mind.
With the new classroom size and some creative thinking, we have some ideas to promote individual activities while still allowing interactions between classmates. There will be plenty of space to allow more then 1 child to work in an interest area. We have created some individual bins with art materials and sensory so that children can have their own set of materials to use and minimize high touch items that can not be cleaned as easily. In more high risk situations, such as eating and sleeping, we have created more space between children, water bottles will be separated with a divider tray and all items will be labelled and cleaned daily. We have set up a toy rotation system to allow items to be switched out to provide interest and variety while allowing extra sanitizing each night. Our goal is to provide a safe and happy bubble where children can thrive but parents can rest assured and go about their work day confidently.
You may wonder if children will be able to socialize and be comforted in this environment. The answer is YES! We know that this is a difficult transition for children who have been away from daycare and routines for close to many months. We will comfort them and keep them busy so they are learning and thriving. Children will also be able to interact with their classmates. They will play with their small group of friends and enjoy some much needed social interaction.
As we welcome new families, transitions will look different but we are committed to transitioning both returning and new families with a loving and empathetic approach. We believe that by following all of the precautions, screening and altering our procedure that we can indeed achieve all our goals. We will use our HiMama app to communicate with parents daily and show them pictures, videos and message them about their day to alleviate any concerns and still be informed about what children are learning and how they are doing. We are continuing to smile because we know how important we are to you – we have a big responsibility – we love our job, and the children and families we serve.
We look forward to it getting back into our routine and seeing all the children and parents in the coming days, weeks and months!
Stay safe and know that we are truly in this together. ~ Air Hugs all around!
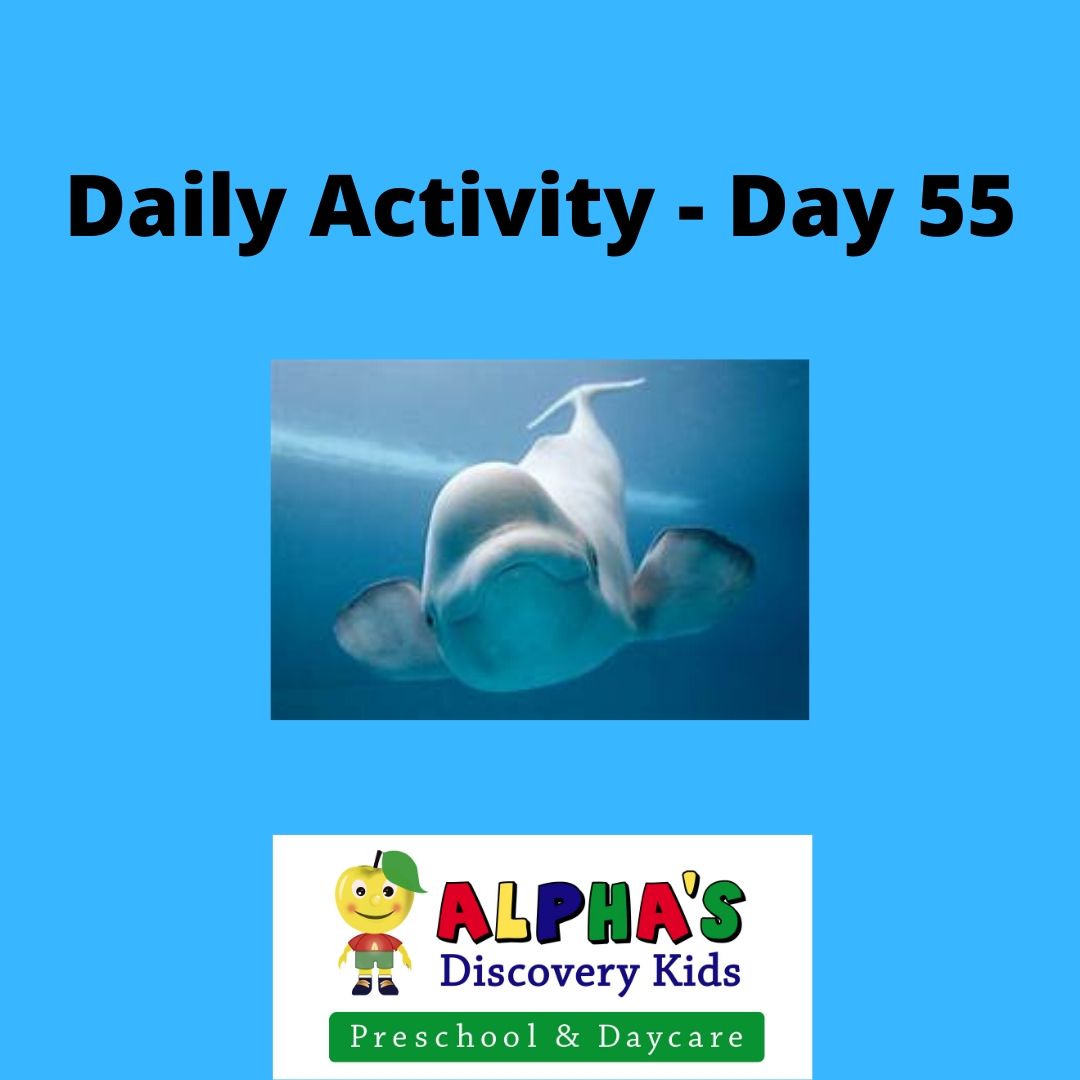
Daily Activity for Kids – Day 55 – Whale Search Activity
Daily Activity for Kids – Day 55 – Whale Search Activity
During this COVID-19 pandemic, many parents are home with their children and looking for things to do. This is a daily post to give you ideas of fun things to do. It comes from activities that we implement at our daycare centre using our Four Pillars of Learning curriculum. Since we are closed during this time, we are sharing the activity for you to implement in your own home. Enjoy!
Daily Activity for Kids – Whale Search Activity
On a rainy day when you are stuck inside, technology can be used wisely to engage in some learning with your child. This activity involves researching animals that need water to survive. Let’s dive deep into the ocean for an adventure today.
We always want to make sure that the websites we are using are safe for children. When you use the internet to do searches with your kids, use the “kiddle” search engine. Kiddle is child-specific search engine supported by Google, which prevents the appearance of things not suitable for them. www.kiddle.co
National Geographic’s Kids is a great resource for information about all kinds of animals. Today we are going to learn about the Beluga whale. The beluga, or white whale, is one of the smallest species of whale. Their distinctive color and prominent foreheads make them easily identifiable. Visit the website and learn more about the Beluga whale. Find out what he eats, where you can find him and listen to the noises he makes.
This daily kids activity incorporates many learning areas based on our Four Pillars of Learning curriculum including: (STEAM: science, technology) and language and literacy.