
Goal setting for Kids: Turn a wish into a goal
GOAL SETTING FOR KIDS:
5 SIMPLE STEPS TO TURN A WISH INTO A GOAL
We all love to dream! In the beloved fairy tale, Cinderella said, “A Dream is a wish your heart makes” but what if we want to turn those wishes into reality. How can we teach our kids to do that? We can teach them to set goals. A goal is like magically turning that dream into reality by setting an intention to achieve that very wish. Teaching children the difference between a wish and a goal is essential and will help your child become a goal-oriented and mindful individual. Here’s 5 simple steps to turn a wish into a goal:
You will need:
• A wish to cultivate from a young dreamer
• Fairy tale movies or books
• A marker
• paper
Learning outcomes
• Language and literacy
• Fine motor
• Self awareness
• Problem solving and troubleshooting
• Self esteem
• Exploring strategic planning
Step 1
MANAGE POSITIVE OUTCOMES
Brainstorm with your child on a possible wishes that can become goals. Be realistic and both age and developmentally appropriate. By doing this, you will set them up for success and they will not give up on goal setting.
When helping your child set a goal or put a dream in motion:
• Take your time
• Keep it simple!
• Play along and make a goal of your own
• Acknowledge each idea and use open ended and encouraging language and tone.
• Do not discourage but set aside goals that may not be attainable right away i.e. Driving a car

Step 2
REMOVE THE MAGIC WAND!
Help children understand there is nothing wrong with having a wish. But waiting for a wish to come true is unrealistic unless of course you have a little “Bibbidi Bobbidi Boo” magic up your sleeve.
• Show your child examples of how people make their wishes come true through action.
• Explore some fairy tale books or videos where this is evident.
• Have fun with this!
Step 3
ENGAGE & EXPLORE
At the start of a brand-new year, we often set resolutions for ourselves but often do not create an action plan to achieve those goals. We need to replace the word “wish” with an intention. Use an action word that will help to accomplish the goal.
• introduce … Action words!
• Set intentions.
• Try to help your child imagine what it will be like when the goal is met with success. How will they feel?

Step 4
INTRODUCE THE MAGIC OF COMMITTING GOALS TO PAPER
It is indisputable that committing our goals to paper and reviewing them regularly gives us a higher chance of achieving them.
• Write the child’s intentions down on paper. You can also cut out pictures and paste them on the paper so that you have a visual of the goal in addition to the words.
• Make a plan of action and answer the questions: Who, what, where, when and why. Knowing why you want something plays a big part in motivation. And more importantly HOW? There may be many HOW’s in the process of getting to one’s goal.
• Help your child set a deadline by asking them how long they think it will take them to achieve their goal.
• Set a reminder on a digital device or calendar with the deadline.
Step 5
• Acknowledge
• Support
• Praise
Remember to do this at every step along the way. A goal isn’t achieved in one day. It takes time and usually a lot of little steps to make it happen. Celebrate those little achievements along the way!
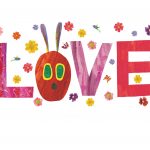
Why we love Eric Carle books to promote early literacy
in loving memory of Eric Carle
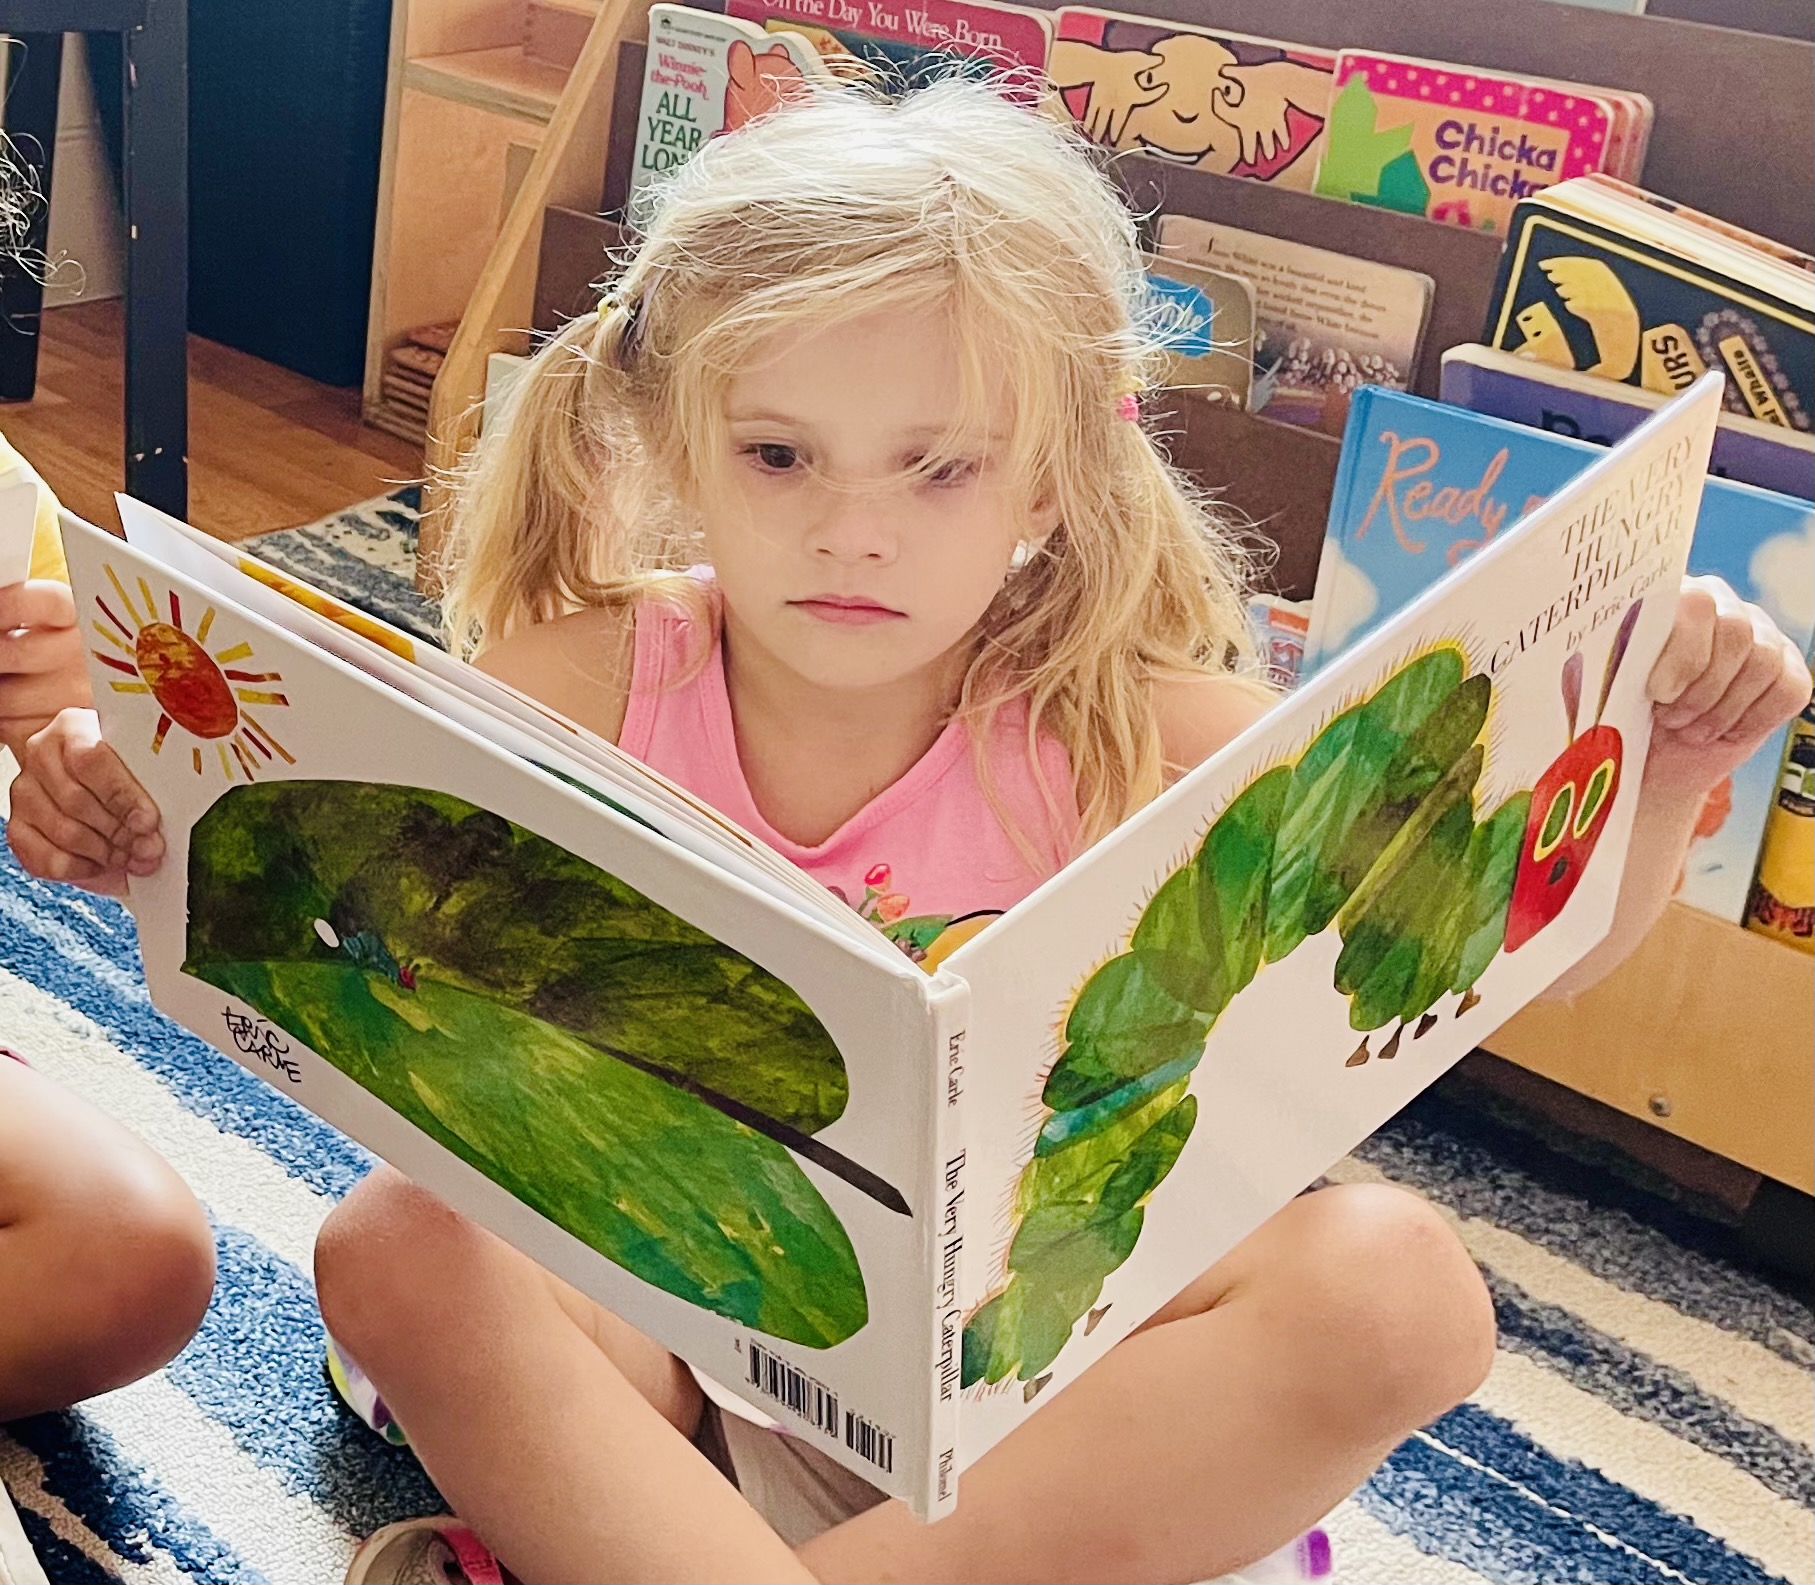
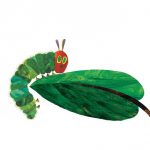
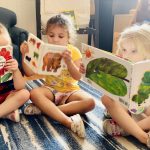
One of our favourite books to promote early literacy at Alpha’s Discovery Kids is The Very Hungry Caterpillar, by Eric Carle. In fact, it was the inspiration for our metamorphosis project last month. Amid our metamorphosis project, author and illustrator of this iconic children’s book, Eric Carle passed away on May 23rd, 2021, at the age of 91. Eric Carle will live on in our hearts and through his legacy of great literature.
The Very Hungry Caterpillar was among many fantastic Eric Carle books known around the world. Other beloved titles from Eric Carle include The Very Busy Spider, Brown Bear, Brown Bear, What Do You See? and The Artist Who Painted a Blue Horse.
For many educators, parents and children of all ages, his works have been a staple in their children’s literature collection. Carle’s incredible collection of work has earned him a variety of accolades, including the Children’s Literature Legacy Award.
Here are three reasons why we love Eric Carle books!
1. Predictive Text
Predictive text builds confidence in young readers. In most of his early literacy books, the designated format repeats throughout the text and allows children to predict it. When young readers pick up on the pattern, you see the sparkle in their eyes. At first, they read along with you. Then, they use the pictures along with the pattern to feel like they are “reading”. This develops confidence right from the start. Be sure to point to each word as you read it to demonstrate one-to-one correspondence.
2. Life and Life Lessons
The Very Hungry Caterpillar is amazingly useful in so many ways. It creates a sensorial early literacy experience when children touch the holes on each page. When children engage their senses beyond listening during a literacy experience, they retain more knowledge. Any time that children are touching, feeling, and interacting with the text, is a win! Additionally, the very hungry caterpillar can be tied into many real-life topics and teachable moments such as the life cycle of a butterfly, eating healthy and the days of the week.
- The Grouchy Ladybug – teaches about manners and encouraging prosocial interaction to build connections with others in an appropriate way.
- Brown Bear, Brown Bear, What Do You See? is an all time classic that teaches children colours, and animal names in an abstract and imaginative way using unexpected colours like “purple cat” or “blue horse”
- Panda Bear, Panda Bear, What Do You See? and Polar Bear, Polar Bear, What Do You Hear? have the same predictable patterns. Panda Bear addresses endangered animals, which can be a great way to tie in social studies. You can identify where the animals in the book live on a map and talk about ways to help these animals by doing things like taking care of the environment.
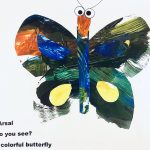
3. The Illustrations are AMAZING!
Eric Carle’s art is distinctive and instantly recognizable. His artwork is created in collage technique, using hand-painted papers, which he cuts and layers to form bright and cheerful images. The brush strokes show texture and dimension and a signature creation that can only be connected to his unique style. A true work of art on every page!
These books inspired us to create our own book using his technique. Here’s what we did, and you can do this at home too!
- Paint an open-ended abstract picture.
- Ask the child to name their favorite animal.
- Cut out the painted picture into strips or shapes.
- Glue the pieces together in the shape of their favourite animal. They may need some assistance with this part.
- Add the text in the format “Child’s Name, Child’s Name, what do you see?
- Record the name of the animal and colour with the text. “I see a Colour Animal looking at me!”
- You can laminate the page and create more pages to make a book. Assemble the pages with a hole punch and binder ring.
Voila! You have your own homemade “Eric Carle” style book that your family will treasure! Our children love to make homemade books and keep going back to read them over and over again!
Take a look at our metamorphosis project video.
Mindful Mud – An Essential Play Experience!
Mindful Mud – An Essential Play Experience!
While the idea of getting messy to some may be unappealing, especially a parent or caregiver that has to clean up the mess! For those that may be skeptical, consider all the benefits of playing in the dirt.
The earthy goodness of mud gives our kids an opportunity to engage in messy play, practice mindfulness and connect with nature. Think of a time when you made a sandcastle and suddenly lost track of an hour. That was you, feeling the effects of mycobacterium vacate. This is a big word for the microscopic bacteria in dirt that increases the serotonin level in our brains, making us feel happy and relaxed.
Our young technologically savvy generation of kids are just not getting enough time to play outside – especially with online learning and technological distractions. While you can simulate many experiences virtually these days, playing in the dirt is not on that list.
Have you ever noticed that children who play outside laugh more? And laughter leads to feeling good! Kids who play outside also grow in their character development: they become more adventurous, more self-motivated, and they are better able to understand and assess risk.
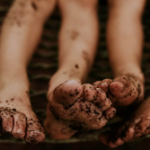
THE SCIENCE OF MUD
- MUD INCREASES BRAIN ACTIVITY– When children play with mud they use all of their senses, resulting in a highly stimulated and active brain.
- MUD INCREASES PHYSICAL ACTIVITY-When children play outdoors, and in mud, the incidental movement and physical activity increases, helping children maintain a healthy lifestyle and develop their physical literacy.
- MUD REDUCES ALLERGIES & ASTHMA SYMPTOMS -Dirt is also great for the immune system, especially in children. Research has shown that early exposure to naturally occurring microbes in soil will help build stronger, more disease-resistant kids.
- MUD PLAY BUILDS CREATIVITY – The open-ended nature of mud play is perfect for the developing brain. There is no end to the creations, ideas and games children will invent. During this type of unstructured, outdoor play, children are not only exercising but are building their ability to form ideas, problem solve, and think critically, as well as be innovative and inventive.
Here are some ideas for your children:
- If you want to control the mess a bit or have limited space, try a mud kitchen !
- Give your child a bucket and a shovel and set them in the dirt. See what happens.
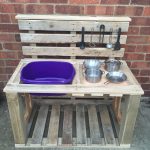
If you really want to control the mess, you can also create a DIY mud sensory bin. Check out our blog on how to create DIY sensory bins.

BabySafe Project – Pregnancy and Wireless Radiation
BabySafe Project – Pregnancy and Wireless Radiation
Have you head of the Babysafe Project? I recently became aware of this project which addresses a very serious issue affecting our future generations of children. What is the impact of widely used wireless technology on the unborn?
I have always been in awe of the process by which humans come into existence. From a single cell to a growing fetus to a baby born into this world full of life! Many women who learn that they are pregnant start to eat differently, take care of themselves and feel a strong sense of responsibility for this new life inside them.
Over time, we have learned more about environmental impacts to children within the womb. From the food you eat to the water you drink to even the air you breathe can all have an impact to that new life growing inside you. It may seem overwhelming but knowing the risks and things you can do to reduce harmful exposures is within your control.

The Babysafe project focuses on one key environmental influence – wireless radiation. They point to scientific research that indicates that wireless radiation exposure can be harmful – even carcinogenic – to your baby and therefore should be avoided or reduced. Visit www.babysafeproject.org to learn more about the science and research and the effects of wireless radiation on both you and your child.
So, what can you do to reduce or eliminate your wireless radiation exposure risk? First and foremost, is awareness of the issue. Spread awareness to everyone you know about the risks and steps you can take to protect yourselves and your little ones.
Here’s some simple steps to reduce exposure to wireless radiation:
1) Do not carry your cell phone on your body – not in your bra or pocket
2) Don’t hold the cell phone, tablet or other wireless electronic device against your abdomen
3) Avoid cordless phones – especially in your bedroom – phones with a cord don’t emit radiation!
4) Streaming results in higher levels of radiation exposure – try to download and then use it in “Airplane mode”
5) Use connected wired devices for your computers instead of wireless
6) Unplug your WiFi router at home when not in use (e.g. at bedtime)
We’re fortunate to have two locally-based national not-for-profit organizations that collaborate with The BabySafe Project in raising awareness about the Project. Canadians For Safe Technology (C4ST) is based in Oakville, online at c4st.org. Electromagnetic Pollution Illnesses Canada Foundation (EPIC) is based in southwest Etobicoke, online at iexistworld.org. These organizations welcome questions, have a wide variety of resources (electronic and printed materials), and meet online with parent groups who want to learn more.
More resources:
In this video, women talk about how they reduce their risk.
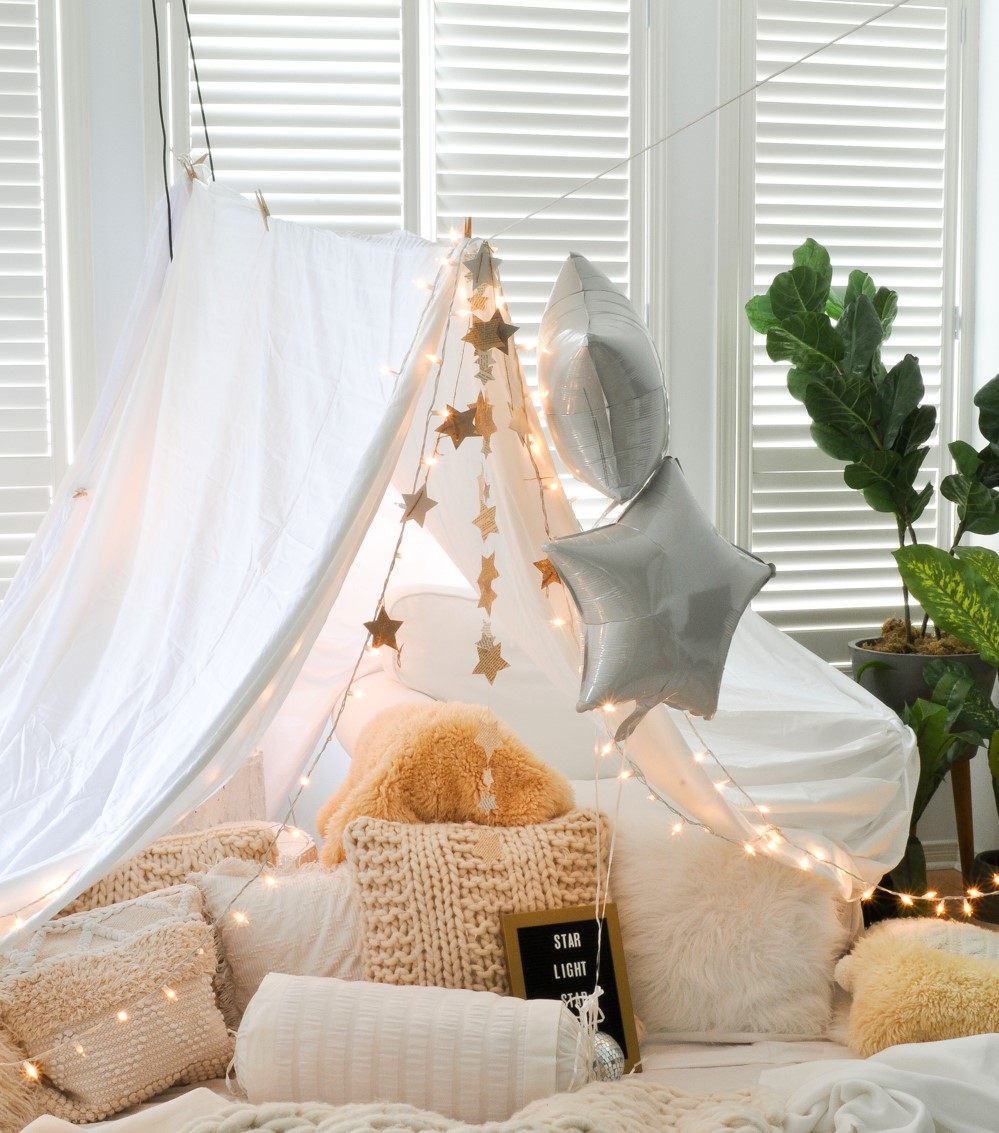
Lockdown Staycation Ideas – Indoor Camping!
Lockdown Staycation Ideas
5 Easy Steps to a low cost and low mess indoor camping experience
Thinking up ideas for a staycation is more challenging then ever with lockdown and stay at home orders in place. Planning ahead can be difficult with the uncertainties of the pandemic. We all look forward to long weekends. In Canada, May 24th is a holiday in honour of Queen Victoria’s birthday and is considered the first long weekend to kick off the summer season. For many Canadians, it means the beginning of camping season, gardening and local festivals, concerts, outdoor markets and picnics. While we can still enjoy some of these outdoor activities, the options are limited by the restrictions of the pandemic. Here’s a staycation idea that actually works really well during a pandemic.
Have you every tried camping in your own home?
Chances are that there is more then one of you out there thinking that even camping in your backyard sounds like a task you are simply not up for.
What if I told you that you are not the only one? It doesn’t have to be difficult. And it can be a lot of fun for both you and your kids!
What if I told you can now camp with the kids, with no packing, no driving, no paying for campsite rental, no bugs, no questionable bathrooms, and you can sleep in your own bed?
This is an opportunity to glam it up with your own style and it will certainly be a post-worthy experience to share – Don’t forget to tag us.
Here’s 5 Easy Steps to create that perfect at-home indoor camping experience!
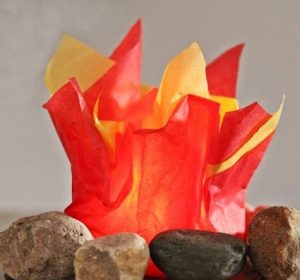
- FORT – Set it up!

No camping experience is complete without a tent. Depending on the age of your children, you can choose to make this an all-hands-on deck project with the children helping set up your camp site or you can make it a surprise. This can be your child’s bedroom, basement or living room area. Notice I am not mentioning outside 😉!
Make it -check out these links for tents you can create with minimal supplies or talent.
https://www.artbarblog.com/easy-forts/
http://www.thriftyandchic.com/2016/01/diy-4-sided-drop-cloth-teepee-for-20.html
Add mini lights & decorations for a pitch-er perfect tent!
2. FOILAGE
Bring the outdoors in! This is really just an extra little thing you can do to bring the outdoors in and enhance the camping experience.
You can gather Outdoor items, stones, logs, branches, indoor or outdoor plants to place around the “campsite” or even setup an artificial tree.
3. FIRE-Spark it up
One of the best parts of camping is the bonfire! A bonfire is the perfect place to gather round and sing a campfire song, or tell funny stories. It’s also a great place to read books.
Make it- click on this link for an easy way to build a crafty campfire.
http://aboutfamilycrafts.com/how-to-build-a-campfire/
4. Food- Feed the fam!
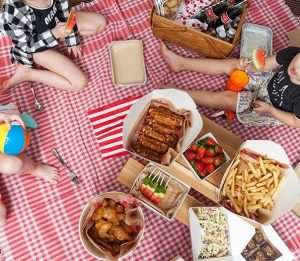
If you don’t have a fireplace to roast marshmallows the next best thing to the campfire is a BBQ. Grill some hamburgers, hot dogs, corn or make simple PB&J sandwiches. You can even roast marshmallows by holding a stick above the heat of the BBQ grill.
Whatever you decide to do – Keep it simple!
Here are 3 S’more options to enhance your camping staycation
Make it-Microwave Smores- https://shelfcooking.com/smores-recipe/
Smore snack bag- https://ziploc.com/en/Recipes/Sweets-And-Desserts/S-Mores-Mix
Make sure you take a nice walk after those sugary smores and tire out those kiddo’s so everyone gets a good night sleep including Mom & Dad!
5. FUN!

Last but not least, Have Fun!!!
Hopefully by now the kids are tuckered out and ready to retire to their sleeping bags. Before they do, make it dark, turn on those string lights, lamps and flashlights and play with the shadows. Add in some soothing nature sounds and soothing music too!
You can even make your own stars on the ceiling with a flashlight! Just cover the flashlight with black paper and cut out the stars.

More ideas to add to your indoor camping experience:
Read some camp related stories
https://www.pre-kpages.com/books-camping-preschool/
Shadow puppets
https://whereimaginationgrows.com/exploring-light-with-shadow-puppet-play/
Starry sky flashlight
https://happyhourprojects.com/make-a-starry-night/
To learn more about Alpha’s Discovery Kids Programs, click here!

Planting a seed to inspire learning
Planting a seed to inspire learning
Planting a seed is the simple act of setting a process into motion – both in a garden and in a classroom. As educators in the classrooms, we are always planting seeds to spark children’s curiosity, inquiry and discovery. With an emergent curriculum such as ours at Alpha’s Discovery Kids, students are empowered learners, and the teacher takes the journey along with her class.
In many cases, children spend a great deal of time in a childcare setting with limited experiences in the world, especially during a pandemic. Planning based on the children’s interests is not effective all on its own. That is why we introduce projects to expand on the child’s learning. As educators of young children, it is our responsibility to empower children and to make them a big part of their own learning. It is important to understand that it does not necessarily matter where the topic originates from, if the direction it takes from inception follows the lead of the children.
One of the ways we do this is by providing and introducing rich, developmentally appropriate materials and new topics and concepts that the children may not be exposed to yet. By providing engaging materials that encourage exploration and creativity, we can provide opportunities that are open¬-ended and through these experiences provoke further interests. The materials can be purposeful, intentional and project based without becoming teacher directed.
We are continually plantings seeds in the minds of the children to inspire curiosity with the goal of teaching the children something new. Our educators have gained confidence in knowing it will take form without direction. A seed cannot stay a seed forever once planted. When cared for with nourishing soil, rays of sunlight, and water, they change shape and start to become whatever it is they were meant to be. We apply similar parallels to our approach to child development and learning. Like all things that grow, plants, trees, flowers, we want them to flourish!
To find out more about our Four Pillars of Learning curriculum, click here.
Follow us on Facebook or Instagram to see the curriculum in action. We offer many ideas that you can also try at home!
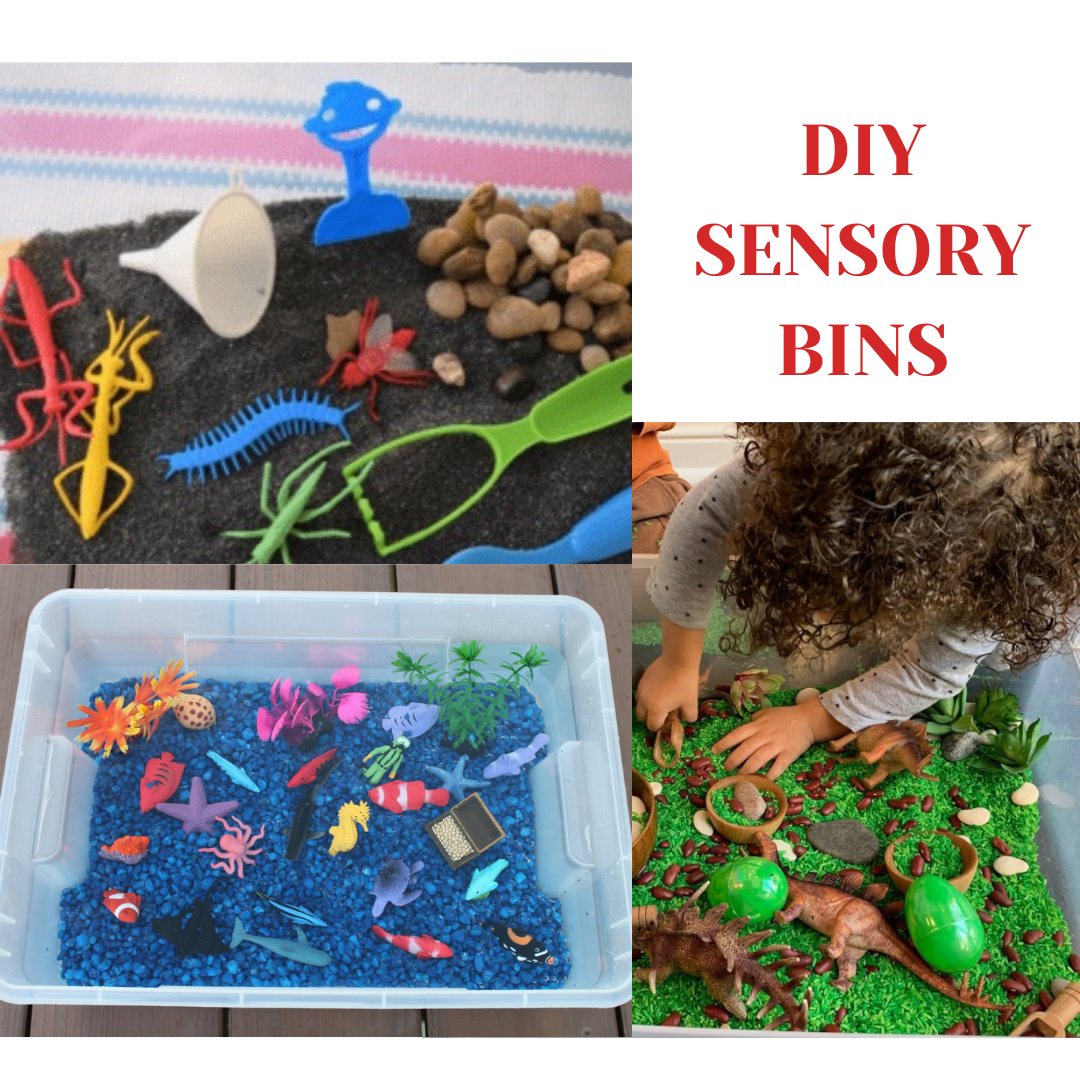
DIY Sensory Bins – How to Make your Own Sensory Bin
DIY Sensory Bins – How to Make your Own Sensory Bin
Sensory bins are an amazing educational tool for children to learn about their world using their senses! Young children tend to gravitate toward sensory play as they tend to explore their world with their senses. The benefits of sensory play are numerous. Sensory play helps children to focus, helps them to feel calm and it develops many skills from cognitive to physical to social skills.
Recently, I saw that a local craft store was selling pre-made sensory bins for $25 but you can make your own for a lot less. At Alpha’s Discovery Kids Preschool and Daycare, we make individual sensory bins for each child and change the items in the bins almost every day. Here’s a step-by-step guide to making your own sensory bin.
To make your own sensory bin, you first need to know what it is! A sensory bin is a hands-on sensory experience for kids, in a contained area such as a storage container. It contains many different items that can be explored using your senses.
STEP 1: CHOOSE A CONTAINER
When choosing a container, consider your space and choose something that will fit in your space. The size of the bin will depend on the age of the child, but as a rule, try to find the biggest container that your child can manage. The child should be able to hold the bin and take it from a shelf independently. Plastic clear containers are best with a good lid that seals well. You don’t have to spend a lot on the container as you can usually find them at a dollar store for a few dollars.
STEP 2: CHOOSE THE FILLER
The sensory bin filler is the item that makes the sensory fun. Please note that you can change your filler often – but we recommend at least once per week to make it interesting for your child and keep it clean. Some examples of fillers are: water, sand, rocks, water beads, shredded paper, coloured Epsom salt, play dough, fake grass, fake snow, wooden beads and natural elements (leaves, twigs, soil, seeds). You can also choose food items such as beans, dry pasta and rice but we prefer not to use food items, to minimize food waste. Keep in mind your child’s age and ability when choosing a filler (including potential choking hazards) and ensure that play is always supervised by an adult.
STEP 3: ADD ITEMS
Once you have the filler, the next step is to add items that spark the child’s interest. One of the best parts of sensory bins is all the filling, dumping, pouring and transferring that takes place! When adding items, you are only limited by your own imagination – or your child’s if they choose their own items to add. The items you add will depend on what type of filler – for example, you will have different items if the filler is water vs. wooden beads. Here’s some ideas for items: sifter, sieve, smaller containers, watering can, shovel, buckets, animals, dinosaurs, cars, dolls, spoons, small bowls, rolling pin, cookie shape cutouts, etc. You can also choose a theme for your bin to focus the learning on a specific concept – such as bugs, oceans, or rainbows.
Step 4: HAVE FUN!
The best part of making sensory bins, is getting to enjoy them with your child! We encourage you to play and explore along side your child!
For more information about our Four Pillars of Learning Curriculum, visit our curriculumcurriculum page.
For more ideas on how to engage with your child, visit our Youtube page.

Heart-centred yoga for kids
Heart-centred yoga for kids
Valentine’s Day is almost here. It’s a great time to stop and think about what love means to each of us. When we ask the children what they love they often tell us “Mommy & Daddy ” and sometimes “cookies”. Another great way to honor Valentine’s Day is by opening our hearts through creative movement.
Although at this time of year, we often focus on loving others, self-love is also important. In fact, it’s often said that you can’t love anyone else until
you love yourself first. Self-love starts with taking care of our bodies, minds and spirits and being healthy.
At Alpha’s Discovery Kids, we are packing our student’s toolboxes with mindful awareness skills through our Four Pillars of Learning curriculum. Yoga poses are a great way to connect to our body, mind and spirit. WE LOVE YOGA and this adorable series of poses really make our hearts skip a beat.
Here’s a poster to assist you with your poses.
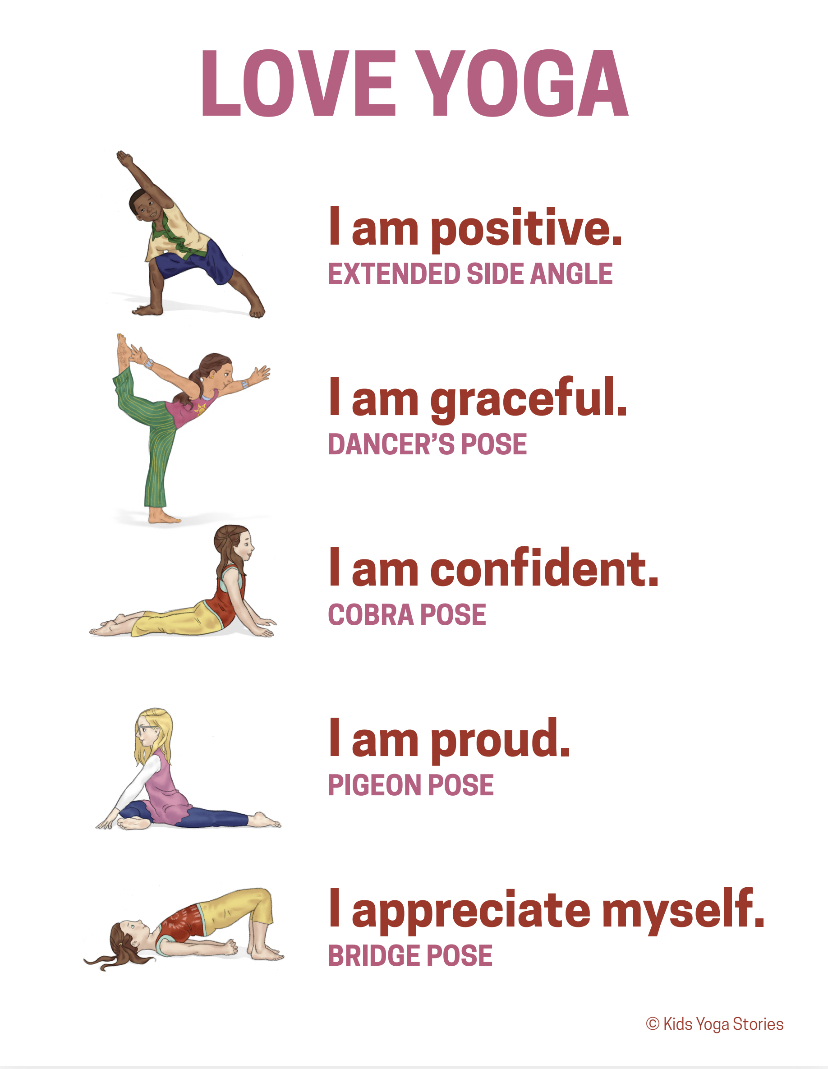
REMEMBER It’s called practice because it takes time to learn. As always don’t forget to BREATHE and be safe.
xoxoxo
For more lovely kids’ yoga ideas, check out www.kidsyogastories.com
For more information about mindfulness check this out: https://inlpcenter.org/mindfulness-training-experience-the-benefits-in-your-life/
For more information about how we teach mindfulness with young children, check out our Youtube Video.
M is for Math
M is for Math
At Alpha’s Discovery Kids we understand the importance of educating children using a wholistic approach. Math is a key component of our STEAM (Science, Technology, Engineering, Art and Math) program which is the second pillar in the Four Pillars of Learning curriculum.
Math plays a major role in a child’s development and helps children makes sense of the world around them. Children between the age of one to five years old are beginning to explore patterns and shapes, compare sizes and count objects.
Building numeracy skills is one of the first things you will do with your child. Many children learn to count from 1-10 by the age of 3 years old. There are so many opportunities to count with children daily. You can count the cars on the road or the plates at the table or blocks in a tower. The key is to incorporate counting with everyday objects in a hands-on way so that it makes sense to a child and they can visually see the objects being counted. Once they have the concept down, you can start to introduce the actual written numbers so they can associate the concept with the actual number.
Using number concepts and skills to explore their surroundings will enable them to problem solve in the future. It helps them to develop confidence in their ability to think things through and develop a process that makes sense to them.
Problem solving skills can be a difficult concept for many children. Supporting this process without doing it for them can support growth and development. It can assist with a sense of accomplishment. Helping children to create connections to discover various relationships. (e.g. characteristics, size, colour, shapes)
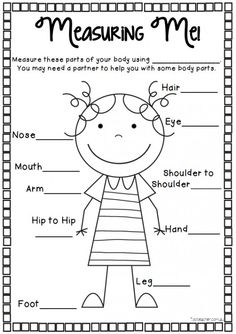
Measurements can include ordering and comparing objects to figure out time, weight, length and graphing. I love to use measurement to teach so many math concepts. Here’s a simple activity you can do with measurement. Take out a measuring tape and measure your hand and your child’s hand. Compare the size of your hand to your child’s and look at the number (size) of your hand vs. your child’s hand. This will help your child to understand bigger numbers and smaller numbers. You can also count the numbers of the measuring tape. You can continue this activity with your feet and other body parts as well as your whole self. It’s a great way to teach numeracy and comparisons of numbers.
Classification can be turned into a fun game that allows children to make like items. You can provide them with a blue, red and black basket. Then lay out multiple objects in the same colours. Ask the children to sort them into their proper baskets by matching the colours.
When you stop and think about it, math is used in many every day tasks performed by young children. Anything they do can be counted and documented.
As you can see, Math does not have to be difficult! It can be fun and easy! To find out more about our Four Pillars of Learning curriculum, click here.
Unique Way to Celebrate Birthdays
Unique Way to Celebrate Birthdays
Everyone wants to be remembered and cherished on the special day that they were born and young children are no exception.
The Montessori “Celebration of Life” is a lovely way to celebrate a child’s birthday in a daycare or school setting. Children love to hear about the journey from their birth to the present day. They want to hear stories, look at photos, and remember wonderful memories. They want to know how cherished they are, and how our life and world is better because they were born into a family and now
belong to our class/ group or school. The Montessori “Celebration of Life” is a wonderful way to celebrate birthdays at school, whether or not
you follow the Montessori philosophy.
Here’s how it works. For the preparation, the parents of the birthday child are asked to bring in a picture for each year of the child’s life starting
with a newborn photo. For example, if the child is 3 years old, 4 pictures are required – Newborn, 1st year, 2nd year and 3rd year.
All the children make a large circle around the sun that has been placed on the floor. Around the sun are each month of the year from January to December. The teacher then begins to describe the birthday child’s journey as she holds up the first picture. The teacher discusses the milestones and accomplishments that have been achieved over each 12 months for the birthday child. They then sing the song below as they hold a globe and slowly circulate it around the sun and stopping once their hand returns to the current month.
This is repeated for each year the birthday child has been on earth. This process places value on the child’s accomplishments and achievements as they have developed since birth.
(to the tune of The Farmer in the Dell):
The earth goes around the sun,
The earth goes around the sun,
The earth goes around the sun,
It takes 1 year to go around,
Another year is done
Then to complete the celebration the following can be sung to the birthday child (to the tune of Happy Birthday):
We celebrate your birth,
And your place on the Earth,
May the sun, moon, and stars,
Bring you peace where you are!
For more information click here.